Having control over your irrigation, whether it’s for commercial or residential use, is an important step for any gardener.
We’ve put together a step-by-step guide showing you how to wire a K-Rain Solenoid Valve and Master Valve to our new WX8 Wi-Fi Irrigation Controller.
Watch our new “Three Minute Thursdays” video guide, or read through the steps below.
What is a Master Valve?
A Master Valve works like a back-up valve. When your controller signals a solenoid to open, it also opens the master valve at the same time. When no valves are operating, the master valve will shut off the water to your irrigation system. By shutting off the master valve the systems’ pipework is not under pressure.
1. Attaching the Master Valve
Screw your Master Valve to the top end of the manifold making sure you have the valve facing the right direction. K-Rain Solenoid Valves have an arrow to indicate which way the water should flow through.


2. Attaching the Solenoid Valve
Do the same with the Solenoid Valve, in this demonstration we needed 25mm nipple to connect the solenoid to the manifold.
3. Connecting the Active Wire
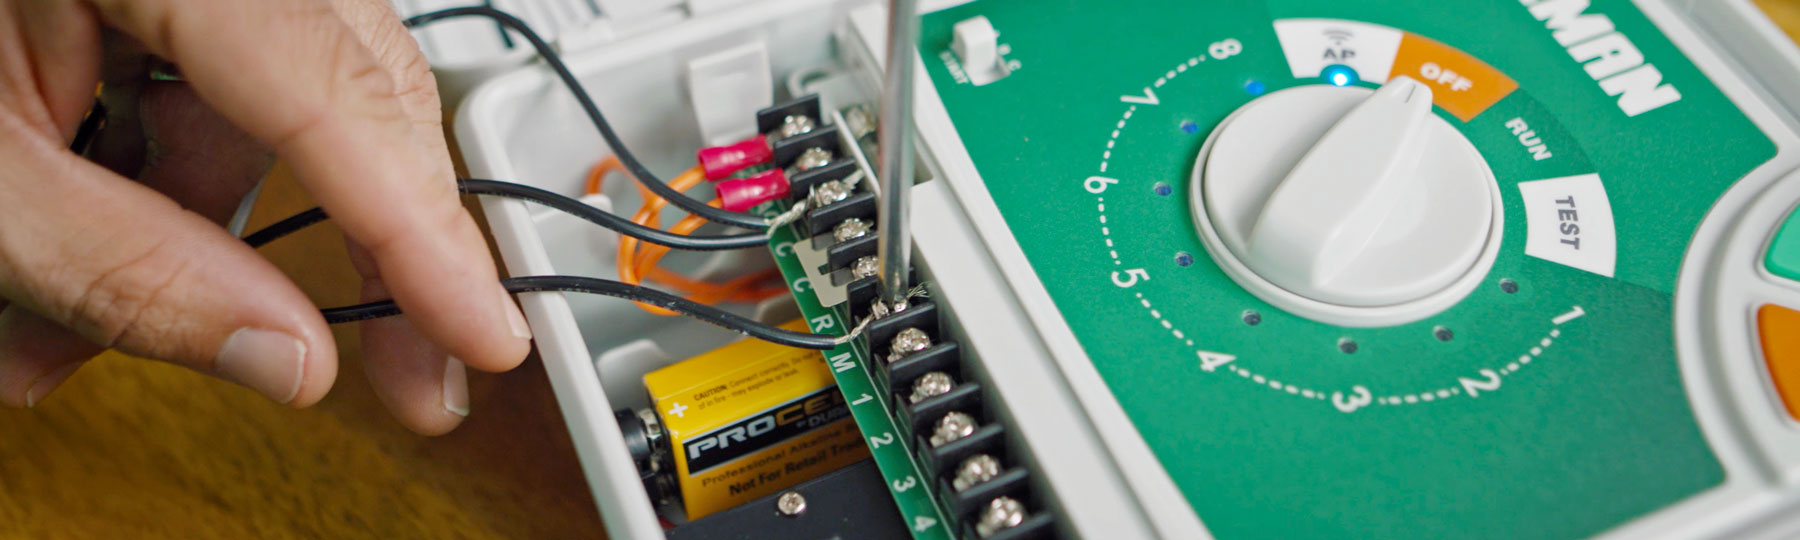
Once your two valves are secure, separate the two cables on your Master Valve. Choose one wire to be the ‘active’ wire. Open the bottom of the WX8 Controller by removing the bottom panel.
Take your ‘active’ wire and thread it under the terminal marked ‘M’ (you may need to loosen the screw beforehand). On some other brands of controllers this terminal may be label as P or P/S. Hand tighten with a screwdriver to secure the wire.


4. Connecting the Common Wire
Now take the other wire on your Master Valve and connect it to a wire on your Solenoid Valve, secure by twisting the ends together, this is your ‘common’ wire. Then thread both wires under the terminal marked ‘C’. Secure by hand tightening with a screwdriver.
5. Connecting the right Zone
Take the remaining wire on the Solenoid Valve, this cable will determine which station (or zone) you want to designate to you Solenoid. For this video we chose station one. Thread the wire under the terminal marked ‘1’, if you wanted it to be station 2 you would thread the wire under terminal ‘2’, etc. Hand tighten with a screwdriver to secure.


4. Testing the Connection
To test that everything is working correctly, turn on the power to your controller. Turn the dial to Station One and then press START. The solenoids should both start to hum if they are connected correctly.